Soon after I first discovered how awesome quilting can actually be, I thought it should be pretty easy to develop my own patterns. I mean, I'm an engineer! How difficult could it be? Apparently, I need a refresher course in basic geometry because I totally F'd up my first pattern. Thankfully, I actually like the outcome, BUT it's definitely not what I initially wanted and I spent an embarrassing amount of time agonizing over the correct measurements so that next time I can create the pattern as it was intended {by me}. Here's a photo of the pattern I sketched for a 16"x16" pillow cover:
Look at those pointed corners! (and my old engineering paper.....awwww, I love that stuff)
Annnnnnnnddddd, here's how it turned out:
ACK! What happened to the pointed corners???!!! Don't get me wrong, I love how the pillow looks, but my heart sank when I first sewed a couple blocks together and realized I had completely lost the pointed corners. Even though I was pretty upset over it I decided to roll with it and keep sewing.
I used pieces from a Little Apples charm pack. I pre-washed these pieces so even though they started their lives as 5"x5" squares, they got distorted in the washing and drying cycle. I wanted the finished blocks to be 4"x4" so I think I did some slight trimming on the charm pack pieces.
If you're a moderately experienced (or even a beginner) quilter or perhaps a better engineer than myself {who can actually do simple math in your head} then you can probably figure out pretty easily where I went wrong. Basically, I took the pieces from the charm pack, cut off the corners and then used those corners to sew onto other pieces that had the corners cut off. But I can't use the corners that were cut off from these squares and end up with pointed corners like in my pattern because these corner pieces are now too small. I don't know why I thought it would work.....I guess I forgot about the seam allowances and how it would affect the size of my blocks. I was also trying to not be wasteful....oh well. Lesson learned! After all the trouble I went through with the front of the pillow cover, I decided to do a very simple design on the pillow back: SQUARES!
The border on the front and the binding on the back is a grey fabric that I got on super sale at Jo-Ann Fabric. It doesn't quite match the grey in the Little Apples collection, but it's close enough for my personal taste. (Also, I didn't even notice until I took the photo below that the greys in the fabric collection aren't even exact matches.) Since I didn't have any zippers lying around and I really didn't want to leave the house just to get a zipper AND I was super anxious to get this project done, I decided to design the pillow back with an envelope style and I really, really like how it turned out. I think the finished size of the pillow cover is slightly smaller than 16"x16", but it fits the pillow form almost perfectly.
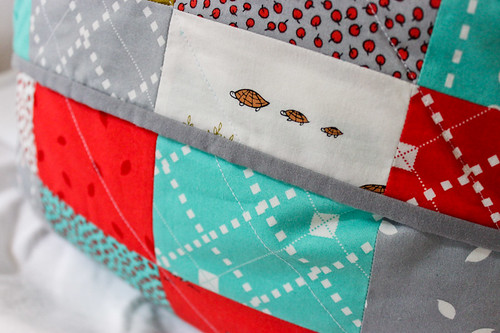
Here are some close-up detail shots:
The pillow cover is lined with muslin, but I didn't use any batting because I didn't think it was necessary to provide additional bulk to the pillow. Even though I didn't use any batting I still "quilted" the front and back, but wanted to keep it fairly simple to highlight the blocks and prints on the fabric.
Details
Pillow Cover finished size: approx. 16"x16"
Pillow Cover style: envelope with binding on back flap edges
Fabric: Little Apples charm pack and grey fabric from Jo-Ann Fabric
Lining: lightweight muslin
Batting: none
Quilting: White thread
If you're even the least bit interested in starting to learn how to quilt, I would highly recommend making a small project first before jumping into a large quilt and a pillow cover is a perfect first project. It's a decent size to incorporate larger cuts of fabric and/or practice creating blocks with smaller pieces. And if you don't want to worry about sewing in a zipper, the envelope-style is super simple to design and sew.
I really enjoyed creating this pillow cover and am looking forward to creating more. They're fairly quick to make, especially compared to a full size quilt, and don't require too much fabric. I definitely see myself making more with leftover scraps from (future) quilts and possibly for different seasons and holidays since it's so easy to change the pillow cover (not to mention I don't want to have hundreds of throw pillows on my couch). The possibilities are endless!!!
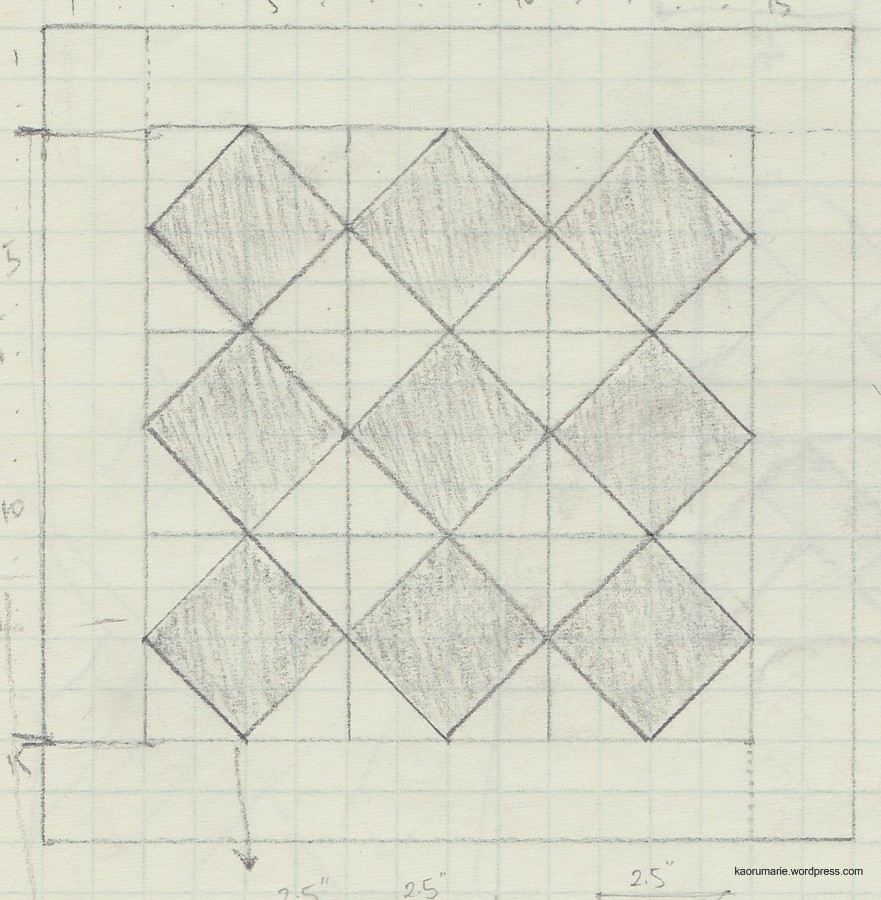 |
| Initial Pillow Cover Pattern |
Annnnnnnnddddd, here's how it turned out:
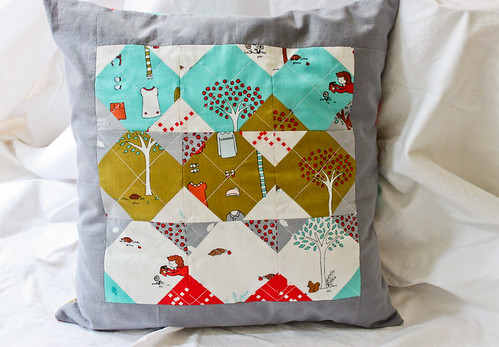 |
| Little Apples Pillow Cover |
I used pieces from a Little Apples charm pack. I pre-washed these pieces so even though they started their lives as 5"x5" squares, they got distorted in the washing and drying cycle. I wanted the finished blocks to be 4"x4" so I think I did some slight trimming on the charm pack pieces.
If you're a moderately experienced (or even a beginner) quilter or perhaps a better engineer than myself {who can actually do simple math in your head} then you can probably figure out pretty easily where I went wrong. Basically, I took the pieces from the charm pack, cut off the corners and then used those corners to sew onto other pieces that had the corners cut off. But I can't use the corners that were cut off from these squares and end up with pointed corners like in my pattern because these corner pieces are now too small. I don't know why I thought it would work.....I guess I forgot about the seam allowances and how it would affect the size of my blocks. I was also trying to not be wasteful....oh well. Lesson learned! After all the trouble I went through with the front of the pillow cover, I decided to do a very simple design on the pillow back: SQUARES!
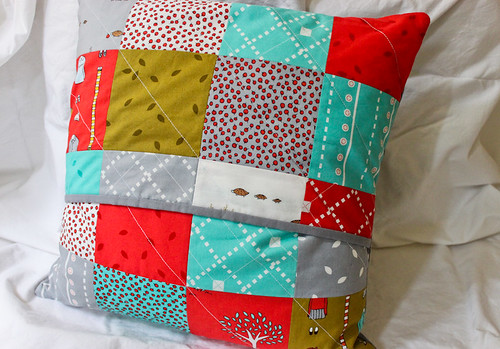 |
| Little Apples Pillow Cover - Envelope Style |
Here are some close-up detail shots:
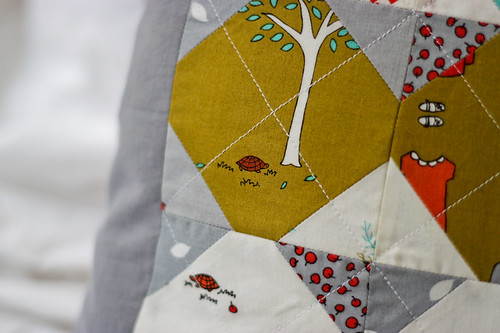 |
| Little Apples Pillow Cover - Front Details |
 |
| Little Apples Pillow Cover - Back Detail |
Pillow Cover finished size: approx. 16"x16"
Pillow Cover style: envelope with binding on back flap edges
Fabric: Little Apples charm pack and grey fabric from Jo-Ann Fabric
Lining: lightweight muslin
Batting: none
Quilting: White thread
If you're even the least bit interested in starting to learn how to quilt, I would highly recommend making a small project first before jumping into a large quilt and a pillow cover is a perfect first project. It's a decent size to incorporate larger cuts of fabric and/or practice creating blocks with smaller pieces. And if you don't want to worry about sewing in a zipper, the envelope-style is super simple to design and sew.
I really enjoyed creating this pillow cover and am looking forward to creating more. They're fairly quick to make, especially compared to a full size quilt, and don't require too much fabric. I definitely see myself making more with leftover scraps from (future) quilts and possibly for different seasons and holidays since it's so easy to change the pillow cover (not to mention I don't want to have hundreds of throw pillows on my couch). The possibilities are endless!!!
Comments
Post a Comment