I have been following the lovely gals at IPB living for quite some time and always marveled at their quilts and blocks and close-up photos of the most beautiful fabric. After seeing one of their recent finished quilts I had had enough. I needed to learn how to quilt! The gals gave me some recommendations on how I could start learning and off I went on the interwebs searching for more clues to unlocking this mysterious world of quilting.
I came across Moda Fabrics and was thrilled to see they have so much information and free patterns! Since I was terrified of screwing up my first quilt I picked a pattern that looked easy for a first time quilter and lo and behold, it was made with the Little Apples fabric collection (by Aneela Hoey) aka one of the most adorable collections I had seen. I HAD TO HAVE IT!
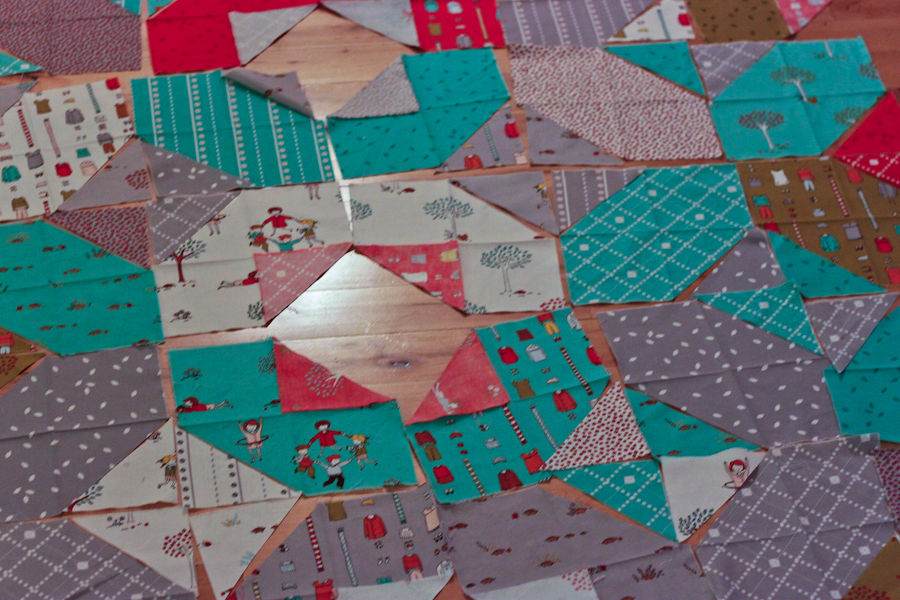
The quilt top was super easy to make, but I think it took me way longer to complete because I was so anal retentive about how I wanted the colors and designs to line up. I spent quite a bit of time lining everything up on my living room floor rearranging the pieces until I was satisfied. Trying to get the seams to line up was definitely a challenge. I tried not to obsess too much since there wasn't much I could do if a seam was way off. It's my first quilt, I have to have fun, right?
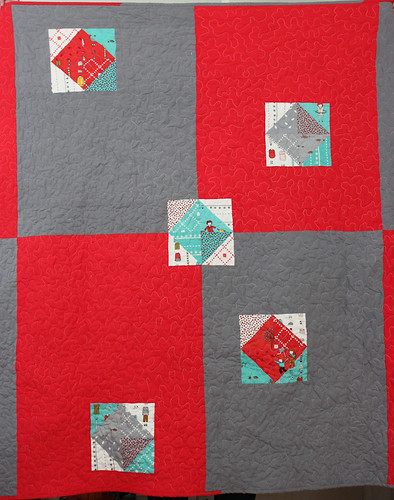
The free pattern on Moda didn't have any directions for the quilt back so I was kinda stumped for awhile about what to do because I didn't really want it to be completely plain. Since I also had some Little Apples charm packs (because the online store sent me the wrong fabric collection!) I decided to incorporate some of the 5x5 squares on the quilt back. I was feeling frugal so I went to Jo-Ann fabric to get red and grey fabric that closely matched the red and grey in the Little Apples collection. They're not exact matches, but they're pretty, pretty close!
I should mention that I totally screwed up making the quilt back. I drew a design on paper and did the math in my head {HUGE MISTAKE!} and I divided incorrectly so the width of the quilt back was too narrow. I didn't even notice the mistake until I laid the batting on the quilt back and saw the batting was so much wider than the quilt back even though I had designed the back to be wider than the batting. I ALMOST cut the batting to fit the quilt back, but decided to lay the quilt top to see what the problem was. And that's when it hit me that I did the math wrong when I designed the quilt back. I had some leftover red and grey fabric {hooray, for always having leftover fabric because I can never figure out how much yardage I need!} so I added some fabric to the quilt back to get it to the appropriate size. Disaster averted!
Then the quilting process..........it was so daunting! Elizabeth Hartman at Oh, Fransson! has really good posts about free motion quilting including some inspirational and motivational suggestions. For instance, who says you have to finish it in one sitting? or even in one day? Thank you, Elizabeth, for reminding me that no one is going to take away any quilting points if I don't slave away for hours and finish a quilt in one sitting. I attempted free motion quilting in a stippling type pattern over two days. It was stressful. It was tiring. It was a learning experience. Lesson learned #1: make sure you have enough thread!!!!! I ran out of thread on the day after xmas. I couldn't believe it. I was SO MAD at myself! I really wanted to finish the quilt that weekend before I went back to work the next day. Thankfully Sew, LA was open that day so I zoomed over there and bought a spool of thread. (Note: it was a different brand than the first spool of thread I was using, but white is white, right?) Lesson learned #2: make sure the quilt edge doesn't get caught in the sewing path! Thankfully I was able to remedy the disaster by making small snips on the fabric edge to pull the fabric threads out of the stitches as opposed to having to rip out the stitches and redo them.
After quilting I trimmed it and then bound it following Elizabeth Hartmann's binding instructions. This quilt was definitely a labor of love! It was time consuming (mainly the free motion quilting) but so much fun to complete. Here are some photos of the finished product.
I can't wait to start on my next quilt!
Quilt Details
Pattern: Little Apples Pattern by Moda Fabrics
Finished Size: Approx. 51"x59.5"
Quilt Top fabric: Little Apples - 1 Layer Cake
Quilt Back fabric: pieces from Little Apples charm pack and red and grey fabric from Jo-Ann Fabric
Quilt Binding fabric: red and grey fabric from Jo-Anns
Batting: Poly-Fil Fairfield 80/20
I came across Moda Fabrics and was thrilled to see they have so much information and free patterns! Since I was terrified of screwing up my first quilt I picked a pattern that looked easy for a first time quilter and lo and behold, it was made with the Little Apples fabric collection (by Aneela Hoey) aka one of the most adorable collections I had seen. I HAD TO HAVE IT!
The quilt top was super easy to make, but I think it took me way longer to complete because I was so anal retentive about how I wanted the colors and designs to line up. I spent quite a bit of time lining everything up on my living room floor rearranging the pieces until I was satisfied. Trying to get the seams to line up was definitely a challenge. I tried not to obsess too much since there wasn't much I could do if a seam was way off. It's my first quilt, I have to have fun, right?
 |
| My Design "Wall" aka Floor |
I should mention that I totally screwed up making the quilt back. I drew a design on paper and did the math in my head {HUGE MISTAKE!} and I divided incorrectly so the width of the quilt back was too narrow. I didn't even notice the mistake until I laid the batting on the quilt back and saw the batting was so much wider than the quilt back even though I had designed the back to be wider than the batting. I ALMOST cut the batting to fit the quilt back, but decided to lay the quilt top to see what the problem was. And that's when it hit me that I did the math wrong when I designed the quilt back. I had some leftover red and grey fabric {hooray, for always having leftover fabric because I can never figure out how much yardage I need!} so I added some fabric to the quilt back to get it to the appropriate size. Disaster averted!
 |
| Little Apples Quilt Back |
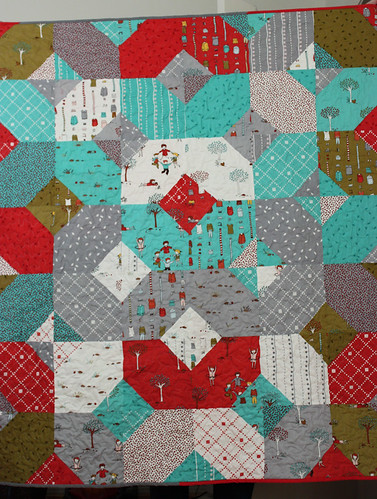
After quilting I trimmed it and then bound it following Elizabeth Hartmann's binding instructions. This quilt was definitely a labor of love! It was time consuming (mainly the free motion quilting) but so much fun to complete. Here are some photos of the finished product.
 |
| Little Apples Quilt Top |
 |
| Little Apples Quilt - Center Back |
 |
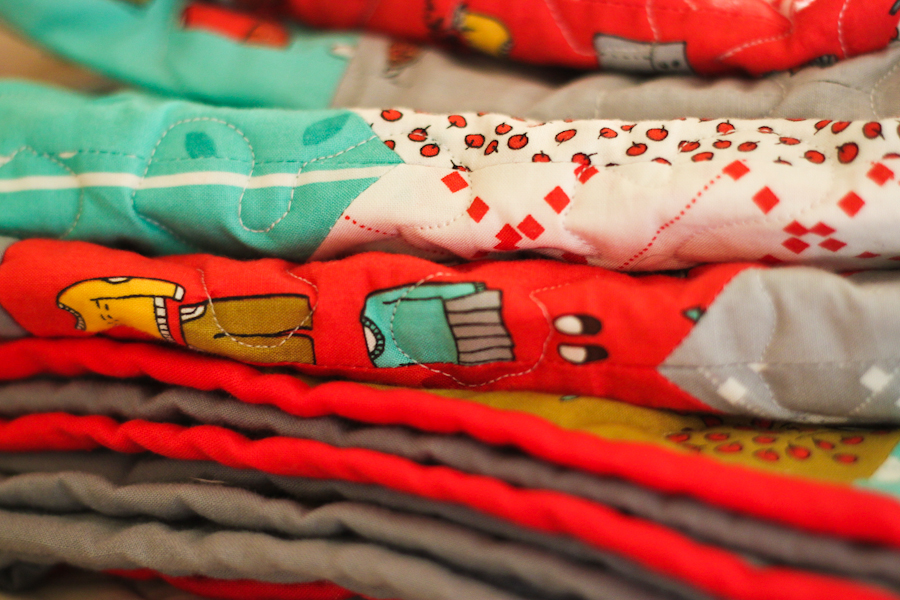
| Little Apples Quilt - All Folded |
Quilt Details
Pattern: Little Apples Pattern by Moda Fabrics
Finished Size: Approx. 51"x59.5"
Quilt Top fabric: Little Apples - 1 Layer Cake
Quilt Back fabric: pieces from Little Apples charm pack and red and grey fabric from Jo-Ann Fabric
Quilt Binding fabric: red and grey fabric from Jo-Anns
Batting: Poly-Fil Fairfield 80/20
Comments
Post a Comment