I am several years late to the Sorbetto Party, but I finally made one! I thought about making a Sorbetto top last year, but of course I never got around to it. A couple Sundays ago, on a complete whim, I downloaded the free pattern on the Coletterie blog and got to work. This was my first time making something with a pdf pattern and I was a little nervous about printing at the correct scale and then assembling the different sheets. My concerns about printing to scale are warranted since I have the most difficult time printing at work. For some reason it takes several tries to correctly print an original 24"x36" pdf to an 11"x17" sheet of paper. (I re-read that sentence and I can't tell if it sounds super nerdy or super lame.)
Anyhow...the great thing about this pattern is that there are only two pattern pieces: Front Bodice and Back Bodice. So freaking simple. Why didn't I make this sooner? Actually, I know. The one thing that kills me about Colette patterns is that the style is just not me. I love looking at the patterns and everyone's creations, and I so badly want to dive in and make all of these garments, but I know the typical Colette Style does not look good on me, which is why I have never purchased any Colette patterns. Most of the styles have a boxier look and unfortunately, on my super petite frame (I'm 4'-11" on a good day, over 5'-0" depending on my shoes and, of course, only short peeps use the "with heels" description), these styles make me look even shorter. (Although, I am tempted to buy the Anise jacket because I think I could pull off the look, but the pattern looks a bit too advanced for me.) With that said, I wanted to try the Sorbetto because it looked simple enough that I could complete it in one evening and I really needed a win to get my sewing mojo back.
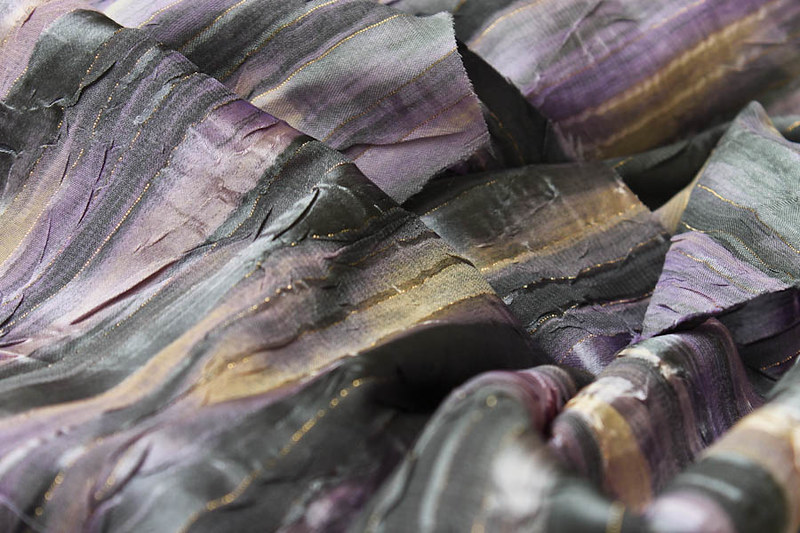
I used fabric that I bought months ago (at least 6 months ago) at Joanns. It was one of those purchases where I saw the fabric and thought, "oh, this would be great for a blouse!!!" and then I showed it to my husband when I got home and his reaction was something like, "really?", accompanied by a look on his face that read, "are you out of your effing mind??" Regret. It was all I could feel. He's no fashion maven, but he can tell good from bad and obviously I had picked bad. I pulled the fabric out of my stash bag knowing it would be a wearable muslin (underneath a fully-buttoned cardigan) and again regretted buying it. It wasn't until I started cutting the fabric that I realized how shitty it is and then I REALLY regretted buying it. First of all, it's a nightmare to work with, but surprisingly enough, I think the Sorbetto blouse is the perfect pattern. I don't even know what type of fabric this is, probably some polyester crap. It's really thin (see-through actually!) sorta sparkly from interspersed gold strands, crinkly with a bit of stretch. The random irregular stretch caused the bodice pieces to be unsymmetrical, but the drape helps to conceal a lot of mistakes. Here is a close-up of the fabric.
I cut a size 0, tried it on. I knew the style would be boxy and loose, but it was waaaaaaaaay too boxy for my liking. I wanted a more defined waistline and took in the side seams by about 3/4" at the waist, tapering at the top and bottom. I totally eyeballed this revision as I sewed, the whole time thinking "WHAT AM I DOING THIS IS GOING TO LOOK TERRIBLE OH CRAP THERE'S NO TURNING BACK!". There is no possible way the two side seams are identical, but whatever, everyone will be too fixated on the fabric to notice the shape. I also felt the front neckline was too low, as in totally not work appropriate. Since the back neckline was also a bit low (for my taste) and I was worried the front armholes were bordering on being too tight, I only brought up the back shoulder seams by about 1/2", which thankfully helped bring up the front neckline a smidge.
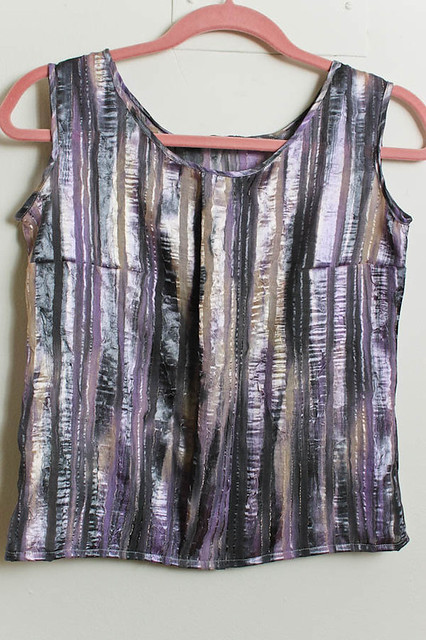
The next task was adding bias binding. I bought a 1/2" Clover bias tape maker months ago knowing I would want or need it at some point in the future. I'm so glad I had it on hand because I would have gone bananas trying to make bias binding without it because this fabric is THE WORST FABRIC for making bias binding. It does not want to crease even with a strong press of the iron. It took me longer to make bias binding than it did to make the rest of the garment. By the time I sewed the bias binding to the neckline and armholes I was too tired to finish the bottom hem. My one night project turned into a seven-day affair....thanks, Fabric. Judgment time! Here's the finished blouse.
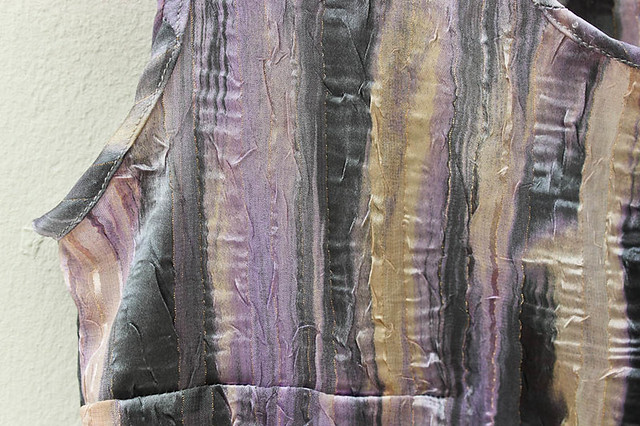
Here is a close-up of the armhole and neckline binding and front dart. Sure, this part of the neckline binding looks fine, but trust me, it's a disaster elsewhere.
Overall thoughts:
I am really appreciative of having access to this free pattern. Even though I hacked away at it I am glad that I made it. This was the first time I made my own bias tape for a garment. I think it is a good piece to build on and revise to your liking. If you want a tighter fit, but don't want to add a zipper, then I would suggest a fabric with a moderate stretch. I can't wait to wear it over a camisole and under a cardigan! Yes, that's right, I haven't worn it yet, but I will!


Comments
Post a Comment