Completed Sewaholic Patterns Minoru Jacket!
Ahhhh, a finished object! I'm thrilled I finally finished something other than a skirt (especially since I can count on one hand the number of times I wore a skirt last year). I thought I was going to finish the Cambie dress first, but after buying fabric for the Minoru Jacket I couldn't wait to get started on it. Here is what it looks like all zipped up:
Here is a description of my sewing process and any alterations I made:
I opted not to make a muslin because (a) Sewaholic patterns are pretty close to my size without major alterations, (b) Lauren of Lladybird made one in a Size 0 without alterations and her posted measurements are close to mine, and (c) I am way too lazy to make a muslin. I cut a size 2 for all the pieces, but I did some major shortening to accommodate my height (I'm 4'11"). I shortened the front, back, and sleeve pieces approximately 3". I wanted a jacket that would cover most, if not all, of my tush, but not extend too far past it. The hem unintentionally ended up being about 3" because I accidentally cut the plackets too short, but the length turned out fine. But, I gotta admit that the entire time I was sewing, I kept praying the jacket would fit, especially in the shoulder/armhole area.
I also used different zipper lengths to accommodate the shortening. The pattern called for a 28" zipper in the front and an 18" zipper for the collar. However, when I was shopping for zippers I held them in front of me and around my neck and the recommended sizes seemed so big on me. I decided that a 24" zipper for the front was long enough and I went with a 14" zipper for the collar, although at the time I was not exactly 100% sure how the shorter collar zipper would affect the construction of the collar and hood. Turns out using a smaller zipper is totally doable. I lined up the hood side seams with the length of the zipper, which means the hood is slightly gathered at the ends when you sew the hood to the collar. While I don't think the shorter collar zipper is disastrous, I do think the hood would look better with an 18" zipper length.
Even though I shortened the jacket length considerably, the 24" zipper does not extend the full length of the jacket from the top of the collar to the bottom of the jacket. The top of the zipper is a couple inches below the top of the collar. When I was shopping for zippers I didn't realize how high the collar would be, which is why I initially thought a 28" zipper was way too long. If you want the zipper to extend all the way to the top of the collar, then you do want to use a 28" long zipper, even if you're short like me.
I read several reviews of this jacket before making it, which I highly recommend so you can get ideas and tips. I especially like the idea of including side seam pockets and lining the hood, although I'm not 100% thrilled with the placement or size of the pockets I added. (I'll fix it next time!)
Another tip other sewists suggested was to line the inside of the collar because you can see the "inside" of the collar when you take the hood out. I kept that tip in mind and even cut an extra collar lining piece, but ended up not using it. The wrong side of my jacket fabric looks almost identical to the right side so I opted not to line the inside of the collar. Howevah, there is one thing I want to fix with the hood/collar, which is add bias binding to the hood/collar seam. When I take out the hood you can peek into the collar and see the unfinished seam. The fabric I used for lining frays a ridiculous amount and I'm sure it'll get out of hand the more I wear the jacket.
As I mentioned above, I shortened the sleeves by about 3". I was worried the sleeves would be too tight once I attached the lining so I ended up starting with a 5/8" seam allowance at the armhole and, sorta quickly, transitioned down to a 3/8" seam allowance for most of the sleeve. The extra 1/4" of room definitely feels better. I added the cuff to the sleeve, but opted not to add the elastic in the cuff.
Here is a peek of the lining and of the one inside pocket that I sized to fit my phone.
Materials:
Main Fabric: Organic Cotton Twill (Plum color, I think) from Mood. The fabric is supposed to be 60" wide, but after washing it seemed to measure in at 50".
Thread: In case you want to use the same color, I used Guterman thread color #445 and it blends right in.
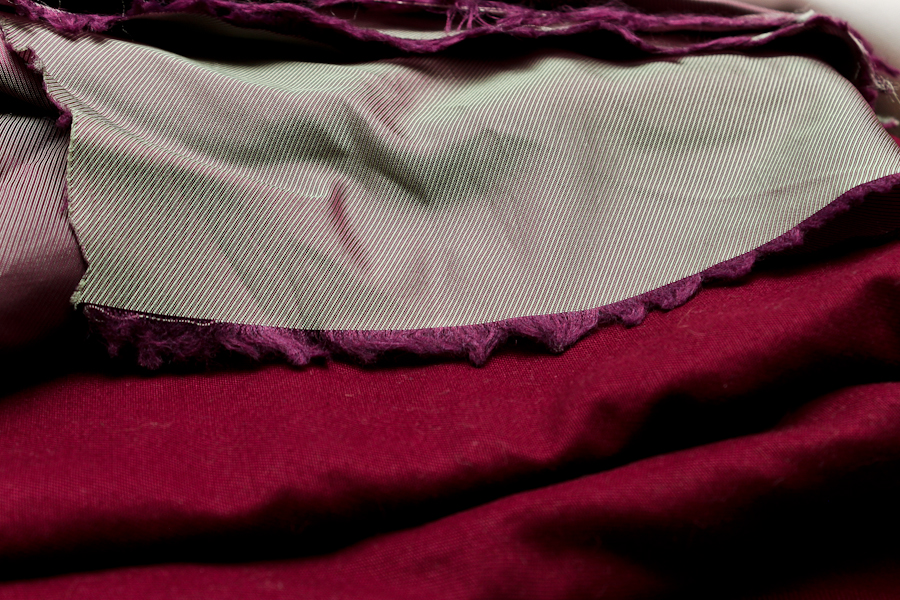
Lining Fabric: Iridescent Maroon/Greenish Fabric from Mood (the tag was missing from this roll of fabric so I'm not quite sure what it is exactly. I searched online for it and everything in the "iridescent" search result is around $12-18/yard, but the guy rang it up as acetate for $3/yard. Either I got a great deal or I'm using total crap for the lining. All I know is, I loved the color and had to have it, but the fabric was a total pain to work with). Based on the photo online, it looks closest to this fabric in color, but I have a hard time believing that what I used was silk chiffon. Here is a close-up photo of the fabric post-wash:

Zippers: 24" separating and 14" closed zippers Coats and Clark brand purchased at International Silks and Woolens
Hours to Make: A lot. I didn't want to keep count because I didn't want to get discouraged. I cut the main fabric one Saturday evening. The following day I finished steps 1-9 and cut the lining pieces. I probably did a solid 5-6 hours of sewing that day. All day I kept thinking I could have finished the jacket the same day if I had started early in the morning and didn't take any breaks, but now I'm not so sure. I finished the rest of the jacket over the course of several evenings the following week.
I gotta say, even though this jacket took a lot of time, I LOVE IT! And the best part is I received a ton of compliments from my family when I showed them the jacket. I thought they were going to say, 'oh that looks nice...[let's talk about something else now]', but instead they were stunned! Seriously, people, Sewaholic Patterns are exceptional! They'll make you feel like you belong on Project Runway. My dad was so excited he got his camera and insisted on taking photos (see above) AND I even made it onto his FB wall. Hahah! He rarely posts stuff, so I feel pretty special that he thought my jacket was worth posting about on FB (although he did post the one photo where I'm making a really goofy face, but I guess most of the photos he took are of me making a weird face). I really want to make another one, but this time without a hood.
And as a reward for finally finishing a pretty awesome garment, I treated myself to the Robson Trench Coat. Treat Yo' Self 2013!!! I have visions of a polka dot trench coat...
Ahhhh, a finished object! I'm thrilled I finally finished something other than a skirt (especially since I can count on one hand the number of times I wore a skirt last year). I thought I was going to finish the Cambie dress first, but after buying fabric for the Minoru Jacket I couldn't wait to get started on it. Here is what it looks like all zipped up:
 |
| I have no idea why I'm making that expression. My dad has an uncanny ability to capture my best faces. |
I opted not to make a muslin because (a) Sewaholic patterns are pretty close to my size without major alterations, (b) Lauren of Lladybird made one in a Size 0 without alterations and her posted measurements are close to mine, and (c) I am way too lazy to make a muslin. I cut a size 2 for all the pieces, but I did some major shortening to accommodate my height (I'm 4'11"). I shortened the front, back, and sleeve pieces approximately 3". I wanted a jacket that would cover most, if not all, of my tush, but not extend too far past it. The hem unintentionally ended up being about 3" because I accidentally cut the plackets too short, but the length turned out fine. But, I gotta admit that the entire time I was sewing, I kept praying the jacket would fit, especially in the shoulder/armhole area.
 |
| Just long enough to cover my tush. |
 |
| You can see that the hood is slightly gathered at the end of the zipper due to using a shorter zipper length than what was recommended in the pattern. No biggie! |
I read several reviews of this jacket before making it, which I highly recommend so you can get ideas and tips. I especially like the idea of including side seam pockets and lining the hood, although I'm not 100% thrilled with the placement or size of the pockets I added. (I'll fix it next time!)
Another tip other sewists suggested was to line the inside of the collar because you can see the "inside" of the collar when you take the hood out. I kept that tip in mind and even cut an extra collar lining piece, but ended up not using it. The wrong side of my jacket fabric looks almost identical to the right side so I opted not to line the inside of the collar. Howevah, there is one thing I want to fix with the hood/collar, which is add bias binding to the hood/collar seam. When I take out the hood you can peek into the collar and see the unfinished seam. The fabric I used for lining frays a ridiculous amount and I'm sure it'll get out of hand the more I wear the jacket.
As I mentioned above, I shortened the sleeves by about 3". I was worried the sleeves would be too tight once I attached the lining so I ended up starting with a 5/8" seam allowance at the armhole and, sorta quickly, transitioned down to a 3/8" seam allowance for most of the sleeve. The extra 1/4" of room definitely feels better. I added the cuff to the sleeve, but opted not to add the elastic in the cuff.
Here is a peek of the lining and of the one inside pocket that I sized to fit my phone.
 |
| I have no idea what I'm doing in this photo. Again, my dad took this photo and he just kept snapping away while I kept squinting. |
Main Fabric: Organic Cotton Twill (Plum color, I think) from Mood. The fabric is supposed to be 60" wide, but after washing it seemed to measure in at 50".
Thread: In case you want to use the same color, I used Guterman thread color #445 and it blends right in.
Lining Fabric: Iridescent Maroon/Greenish Fabric from Mood (the tag was missing from this roll of fabric so I'm not quite sure what it is exactly. I searched online for it and everything in the "iridescent" search result is around $12-18/yard, but the guy rang it up as acetate for $3/yard. Either I got a great deal or I'm using total crap for the lining. All I know is, I loved the color and had to have it, but the fabric was a total pain to work with). Based on the photo online, it looks closest to this fabric in color, but I have a hard time believing that what I used was silk chiffon. Here is a close-up photo of the fabric post-wash:
Zippers: 24" separating and 14" closed zippers Coats and Clark brand purchased at International Silks and Woolens
Hours to Make: A lot. I didn't want to keep count because I didn't want to get discouraged. I cut the main fabric one Saturday evening. The following day I finished steps 1-9 and cut the lining pieces. I probably did a solid 5-6 hours of sewing that day. All day I kept thinking I could have finished the jacket the same day if I had started early in the morning and didn't take any breaks, but now I'm not so sure. I finished the rest of the jacket over the course of several evenings the following week.
I gotta say, even though this jacket took a lot of time, I LOVE IT! And the best part is I received a ton of compliments from my family when I showed them the jacket. I thought they were going to say, 'oh that looks nice...[let's talk about something else now]', but instead they were stunned! Seriously, people, Sewaholic Patterns are exceptional! They'll make you feel like you belong on Project Runway. My dad was so excited he got his camera and insisted on taking photos (see above) AND I even made it onto his FB wall. Hahah! He rarely posts stuff, so I feel pretty special that he thought my jacket was worth posting about on FB (although he did post the one photo where I'm making a really goofy face, but I guess most of the photos he took are of me making a weird face). I really want to make another one, but this time without a hood.
And as a reward for finally finishing a pretty awesome garment, I treated myself to the Robson Trench Coat. Treat Yo' Self 2013!!! I have visions of a polka dot trench coat...
Great Job!
ReplyDeleteHoly smokes!!! What an impressive sewing job, to say nothing of an adorable jacket. I'm totally humbled. Now I can't wait to see your polka dot trench coat, modeled with similarly high-fashion facial expressions, I hope. :D (And is that your parents' backyard? It looks so lush and wonderful!)
ReplyDeletethanks, Schnookie! And yes, that is my parents' backyard. It's pretty small (standard for the LA suburbs), but my dad has tried to plant something in every possible space (including extending the flowerbeds into the grass area). There is a lot of lily of the nile (or valley?), which is what most of the green leaves are, but the flower parts haven't grown yet. And most of the trees are "fruit" trees, but they don't really grow any fruit. My SIL was impressed they have a plum tree until we told her that in the 20+ years they've lived there we've had maybe 5 edible plums.
ReplyDelete